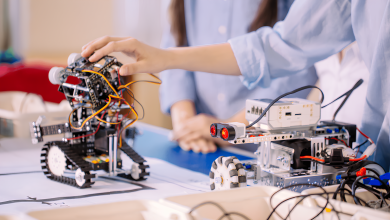
Make Your First Arduino Robot

Have you ever wanted to build your own Arduino robot but didn’t know where to start? Many beginners struggle with the same problem: too many tutorials are either overly complex or too basic. Don’t worry—this guide will walk you through everything step by step, from gathering components to making your robot move for the first time.
By the end of this article, you’ll not only have a working robot but also the confidence to keep exploring the world of robotics.
What is Arduino and Why Build a Robot?
Arduino is an open-source microcontroller platform designed to make electronics accessible to everyone. Think of it as the “brain” of your robot—it processes inputs from sensors and controls outputs like motors or LEDs.
Why build a robot with Arduino?
- Hands-on learning: It’s one of the best ways to learn electronics and programming.
- Affordable: Arduino boards and basic components are inexpensive.
- Scalable: You can start with a simple robot and later add features like obstacle detection, Bluetooth control, or line following.
- Creative freedom: The design possibilities are endless—you can make a car, a robotic arm, or even a mini drone.
Essential Components for Your First Arduino Robot
Before building, let’s gather the parts you’ll need:
- Arduino board (Arduino Uno is the most beginner-friendly choice)
- Motor driver module (like L298N to control DC motors)
- Two DC motors with wheels (for movement)
- Caster wheel (a free-rotating wheel to balance the robot)
- Battery pack (6V–12V, depending on motors)
- Jumper wires and breadboard (for connections)
- Chassis or base plate (plastic or metal frame to hold everything)
- Optional: sensors (like ultrasonic sensor for obstacle avoidance)
These components form the foundation of your first robot. If you buy an Arduino robot kit, most of them will already be included.
Basics of Wiring and Circuit Connections
Wiring might sound intimidating, but it’s simpler than it looks. Here’s the logic:
- Power: The battery powers both the Arduino and the motors.
- Motor driver: Connects between the Arduino and the motors—it allows the Arduino to “tell” the motors what to do.
- Signal pins: The Arduino sends control signals (HIGH/LOW) through digital pins to the motor driver.
Tips for beginners:
- Use a breadboard for testing before soldering.
- Double-check power polarity (red = +, black = –).
- Label your wires if you’re using many jumpers—it prevents confusion later.
Step-by-Step: Building Your Robot
- Mount the chassis: Fix the motors to the base plate and attach the wheels.
- Add the caster wheel: This balances your robot like a tricycle.
- Place the Arduino and motor driver: Secure them with screws or tape.
- Connect the motors: Motor wires go to the motor driver outputs.
- Connect Arduino to the motor driver: Use jumper wires to link digital pins to motor driver inputs.
- Connect the battery: Power the motor driver and Arduino.
- Upload the code: Plug Arduino into your computer and upload a simple “forward movement” program.
At this stage, your robot should be able to move forward.
Uploading the Code and Making It Move
Here’s a simple example code to make your Arduino robot move forward:
// Basic Arduino Robot Code
int motor1Pin1 = 3;
int motor1Pin2 = 4;
int motor2Pin1 = 5;
int motor2Pin2 = 6;

void setup() {
  pinMode(motor1Pin1, OUTPUT);
  pinMode(motor1Pin2, OUTPUT);
  pinMode(motor2Pin1, OUTPUT);
  pinMode(motor2Pin2, OUTPUT);
}

void loop() {
  // Move forward
  digitalWrite(motor1Pin1, HIGH);
  digitalWrite(motor1Pin2, LOW);
  digitalWrite(motor2Pin1, HIGH);
  digitalWrite(motor2Pin2, LOW);
}
Upload this code via the Arduino IDE, power up your robot, and watch it roll forward!
Common Mistakes and How to Fix Them
When building your first Arduino robot, you might encounter issues. Here are common mistakes:
- Motors not moving: Check battery power and wiring. Low voltage often causes this.
- Robot moving in circles: Motors may be wired in opposite directions—swap motor leads.
- Code not uploading: Ensure you selected the correct board and COM port in Arduino IDE.
- Robot doesn’t respond after upload: Reset the Arduino and check motor driver connections.
Remember, troubleshooting is part of learning. Every error teaches you something new.
Frequently Asked Questions (FAQs)
1. How long does it take to build an Arduino robot?
For beginners, around 2–4 hours including wiring and coding.
2. Do I need programming knowledge to build an Arduino robot?
No, you can start with copy-paste codes and learn gradually.
3. Can I control the robot with my phone?
Yes! By adding a Bluetooth module, you can control it via a smartphone app.
4. How much does it cost to make an Arduino robot?
A basic setup costs between $30–$60 depending on the components.
5. Can I upgrade my first Arduino robot later?
Absolutely—you can add sensors, wireless modules, or even camera systems.
